At this point, you’ve probably heard about Windows 10. Microsoft made the OS a free upgrade for many of its existing users and when it released, you could only upgrade your existing system. But what if you wanted to do a completely clean installation of Windows 10? Now you can.
In this quick tutorial, we’ll show you how to turn your existing PC into a fresh new Windows 10 system. Bonus for anyone who is planning on upgrading before July 29th, your upgrade from Windows 7 or 8 is still completely free. Before we get started, you should use the free disk cloning software backup your existing files because you don’t want to face errors like “You need permission to perform this action” in your windows 10 computer. Right? This goes for any new OS install and it should be a golden rule.
How to install fresh copy of Windows 10
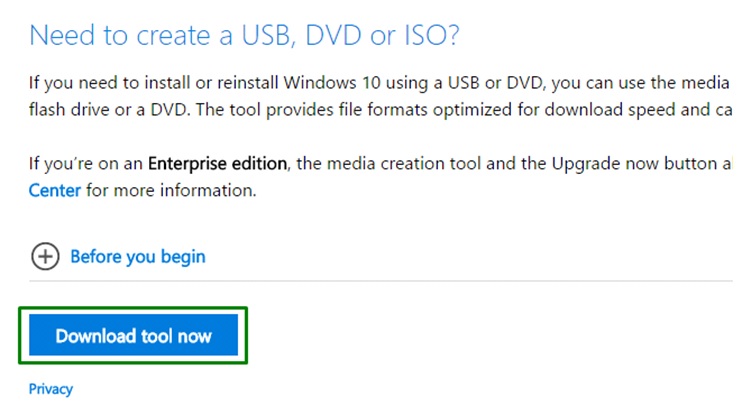
Step 1: Download Windows 10 Media Creation Tool from the Windows 10 upgrade site. We’ve added a link here to make it easy. Make sure you scroll down the page a bit and select the link that says “Download tool now.” This is an important step otherwise you won’t be doing a clean install.

Step 2: You’ll need to create a bootable Flash drive. Find a flash drive that is at least 8GB and make sure there’s no files on it that you want to keep. Everything will be erased off the drive during the next step.
- Find your fancy new “Media Creation Tool” and run the program.
- Select Create Installation Media for Another PC when prompted.
- You’ll be given a few options to choose from when creating your USB. Select the language, edition, and either 64 or 32 bit.
- If you’re installing on the same system you used to download the tool, Microsoft will select its own recommended options, which is nice.
- Select next and wait for the download.
This part could take a while depending on the speed of your USB and your Internet connection, so grab a cup of coffee or tea and take a break.
Step 3: Once that’s all completed, it’s time to boot from the USB. Shut down the PC and restart your system. Most systems don’t automatically boot from a USB when one is available so you’ll probably have to choose the option when your system restarts.
Every system is a little bit different. You may need to go into your system settings or BIOS to get that option. Check with your manufacturer if you are having trouble.
Step 4: We are officially at the point of no return, running the installer. Remember we’re going to be doing a FRESH install of Windows so whatever information might be on your hard drive will be erased after this.
The install process itself is pretty easy. Windows will ask you a few questions.
- First, enter the license key from Windows 7, 8, or 10. The installer only mentions Windows 10 at this point but you can use all three.
- Then it will ask your type of install and you’ll want to select “Custom, Install Windows Only.”
- Then it will ask where you’d like to install the new operating system. We’re going to erase everything and make sure it starts with an empty drive.
Again, it’s coffee time or whatever break you need – because this part takes a bit.
Windows will then ask you to connect to a Wi-Fi network and input your Microsoft login. You can always create a new one if necessary. Now you are pretty much done!
The 5th step is really just making sure you keep your new Windows 10 running smoothly by keeping it up to date. Windows Updates will keep you up to date with performance, drivers, and security to help the system run better. You can adjust the settings to update automatically, ask you first, update at specific off-peak hours, etc.
So that’s it! Enjoy your PC that should now feel like it’s brand new all over again. Thank you for reading this quick tutorial.


![Watch Video Now on xiaohongshu.com [以色列Elevatione perfectio X美容仪 perfectio X 全新仪器黑科技了解下]](https://www.techburgeon.com/wp-content/uploads/2019/07/perfectiox-singapore-150x150.jpg)
